This page may contain affiliate links. As an Amazon Associate I earn from qualifying purchases.
Choosing a 3D Printer for Kids
Updated: October 2019


In this article, I have chosen and reviewed the 3D printers that I think are the best 3D printers for kids and I’ve categorized my reviews based on the age group they’re suitable for.
To help you decide which 3D Printer you should buy I’ve looked at all the models currently available that are either designed primarily for children or are suitable for children and teenagers based on my own experiences.
Here are the four 3D Printers I’ll be recommending in this article:
Why should I buy a 3D Printer for my kids?
3D printing is no longer a misty glimpse into the future! In almost all industries, from auto manufacturers to smartphones, from jewelry to dental products, 3D printing is being used every day. This is why it’s a very good idea to introduce your kids to 3d printing technology now.
There are two significant benefits to your children not only learning about but also having hands-on experience of 3D printing:
3D Printing Encourages Creativity
The big advantage of 3D printing is the immediacy of having a finished product in your hands within hours. What this does is to massively speed up the usual design cycle of Invent>Design>Produce>Test>Improve.
To a child dipping their toes into the world of Engineering, this is a massive benefit because it gives them hands-on experience of the way all products are designed and manufactured. This is the buzz that Engineers live for!
Seeing the design that was in their head a few hours ago being turned into a real physical object that they can hold in their hands and use in the way they imagined is really exciting! It’s the best way to show your kids how fun engineering can be.
And why wouldn’t you want your kids to be Engineers?! The current starting salary for Engineering graduates in 2016 is $62,500 (that’s among the highest of all college graduates) rising to a career average of around $100,000, and they will contribute to society with a fulfilling career!
3D Printing is the Future of Manufacturing
Schools are slow to adapt to new technology. It’s not their fault, they are usually dependent on insufficient funding and have to adhere to curriculum guidelines set by the government. This is why your kids are still taught similar lessons to the ones you and I were, 10, 20 or 30 years ago.
At junior through to high school, if you’re lucky your children learn metalwork and woodwork, they have a go at vacuum forming some plastic, they might get to try some injection molding or how to work a CNC lathe, but they’re very unlikely to get their hands on a 3D printer.
If they do go to a very good school that has access to a 3D printer, it is not likely to be a recent model. 3D printing has evolved a lot in the past ten years! They may well be left discouraged when the completed part takes hours to build and looks like one of my Great British Bake-off attempts rather than the precise replication they were expecting.
Is PLA safe?
PLA heated in 3D printers has not been shown to give off any harmful emissions. The most common plastic used in 3D printers is PLA filament which is short for Poly Lactic Acid. PLA is made from naturally occurring plant materials such as cornstarch and sugarcane. When you use PLA in your 3D printer you may notice a sweet sugary smell.
Of course, nobody wants to take any chances when it comes to their family’s safety so I still recommend using your 3D printer in a well-ventilated room with at least a window open or better still an air filter.
You may be interested in reading my article on 3D printer emissions for further information about how to filter the air around your 3D printer.
Reviews
XYZprinting da Vinci miniMaker 3D Printer
Best for a budget option for young kids and ease of use.
No products found.
Important Specs:
- Age Group: 14+ (8+ with adult supervision) an adult will need to unpack it, set it up, and remove completed parts and clean it after each use.
- Price Range: Budget
- Filament Type: PLA (non-toxic)
- Resolution: 0.1mm – 0.4mm
- Build Size: 5.9 x 5.9 x 5.9 inches
First Impressions
The miniMaker is colorful!! As you can see from the photos it has a very kindergarten primary color look which I think is great for younger kids to make them see it more as a toy than a boring educational tool but I’m pretty sure kids approaching their teens will not think this is cool!
There’s a very similar model called just the Da Vinci Mini which is a more subdued orange color but costs about $30 more because it comes with Wifi, I’d recommend it if you think your kids might be put off by the childish colors but I wouldn’t pay the extra just for wifi.
Other than the color the build quality is excellent, it feels very sturdy and is a very compact size (15.75 x 13.23 x 14.25-in), so you shouldn’t have too much problem finding a home for it.
Setup
I don’t think I’ve ever been able to set up a 3D printer quicker than I could with the Da Vinci miniMaker! You plug in some USB and power cables like you have to with any computer hardware, snap in the printhead, feed the filament tube into the printhead and… that’s it!
The filament auto-feeds, and there’s no calibration required. The instructions that came in the box were kind of lo-fi black and white printouts that looked like the last minute ‘oops we forgot to include instructions let’s chuck something in the box’ decision, but they do the job as the setup is so simple you don’t need anything fancier. I suggest looking at these videos on XYZ’s website before attempting to set it up with the printouts alone.
Software
The miniMaker doesn’t use the industry-standard G-code, and so your only option is to use the supplied XYZware software. This is quite a limitation for curious young minds that learn quickly but is what makes it such a guaranteed to work out of the box success.
The included XYZware software is relatively straightforward to use, but it’s just lacking a bit of feedback, so you are left wondering whether you need to click again or move on to the next step.
It also managed to make all the models I tested face the wrong way when printing! You can easily change this, but please keep it in mind as it’s much more fun to see the front of your model as it’s printing, especially if you want to take photos or time-lapse videos.
Useful information is displayed such as how much filament your model is going to use and how much time it will take to build. We all know how impatient little ones can be, so it’s good to be able to give them an estimate of how long they will have to wait.
The XYZ software does a good job of automatically preparing the models for printing, but there’s no option for adding your own supports so this is an area of 3D printing that kids wouldn’t get to learn about with this machine.
Printing
There are some models included with the XYZ software which serve well as test pieces, but I suggest heading over to Thingiverse to download some more exciting parts.
I tested these Pokémon characters and had good results. The parts are very well detailed, in fact, I’m impressed with them for such a cheap machine.
In use the miniMaker is quiet especially for an open-sided machine, you really wouldn’t want to listen to it for a few hours of building though.
Negatives
There’s one relatively large negative with the miniMaker and that’s the fact you can only use XYZ branded filament. This is bad because the branded filament is more expensive than other makes and there may be times when you want to print a color that is not in the XYZ range.
I can see why the manufacturer has done this. As an entry-level printer, it completely avoids the possibility of someone trying to use the wrong type of filament and messing up the machine. It just feels a little bit too ‘Big Brother’ for my liking.
The machine keeps checks on the filament type being used by incorporating a chip in the filament reel that records how much filament is being used, so if you refill with a different brand the machine will report there is no filament and won’t work.
There aren’t really any ways around this without some fairly complex replacement of the main circuit board so you should keep this in mind when buying the miniMaker.
Please don’t let it put you off too much as you will soon see it takes a long time to empty one of these filament reels, just consider it the downside of being able to buy a very competent machine for under $300.
Verdict
The XYZ miniMaker is great 3D Printer for younger kids and non-tech savvy parents. It pretty much prints successfully out of the box with little fuss. The downside to this simplicity is your kids could grow out of it fairly quickly especially if they are in their teens when more complicated models and fine-tuning of setup are not possible.
Monoprice Select Mini V2
Best budget option for older teens and tech-savvy parents.
Important Specs:
- Age Group: 14+
- Price Range: Budget
- Filament Type: ABS, PLA, XT Copolyester, PET, TPU, TPC, FPE, PVA, HIPS, Jelly, Foam, Felty
- Resolution: 0.1mm
- Build Size: 4.7 x 4.7 x 4.7 inches
First Impressions
Sturdy! The Monoprice Select Mini is mainly sheet steel construction, it’s kind of basic, but in a satisfyingly industrial way with no effort made to hide bolt heads.
However, the important moving parts are well covered to avoid damage or injury. It looks like it belongs in a lab with a white-coated technician operating it. I like it, and I’m pretty sure science-loving teenagers will too!
The full-color screen is very impressive and by far the clearest I’ve seen on any sub $1000 printer, it isn’t touch screen but it does have a nice tactile clicky wheel next to it all mounted on a fancy brushed steel plate.
Note this printer doesn’t come with any filament, some stores state that it comes with a sample filament, but this isn’t enough to build any model with so you’ll need to factor in a further $25-ish for a 1kg reel of PLA filament. The good thing about this printer is you’re free to use any brand of filament so you can shop around for the best value, I recommend Hatchbox filament.
Setup
No instructions were included in the box so I had to find a pdf on the Monoprice website (for reference you can find them here).
The manual says it comes pre-calibrated but user reports suggest you will need to do some tweaking to the build table to get it level, this isn’t a difficult process it’s just a bit tedious and is definitely something that will need to be done by a careful older teen or adult. Feeding the filament is little fiddly (much like this sentence!) itis not difficult it’s just not easy to tell once you’ve done it successfully. Some users have reported cutting the end of the filament at an angle can help.
Software
Monoprice recommends using Cura, Repetier, Replicator-G or Simplify3D software, which is astonishing compatibility. All are highly regarded, and someone used to computers will have no problem navigating their way around an of them with some practice.
Personally, I’d recommend Cura as it can prepare parts for you or give you complete manual control and everything in between. Being able to use third party software is one of the big benefits of the Select Mini as it opens up a whole world of advanced settings and CAD model preparation that is really no different from what is done in industry.
Printing
This 3D printer is fairly loud; I’d say you will really need to be able to keep it in a room that you can walk out of and close the door on. It does have an SD card slot, and I’d definitely recommend that you transfer files to it in this way. Then you can keep your computer/laptop separate from it while it builds away, the large color LCD screen makes this a doddle.
The test part printed quickly, and with no problems, the quality is excellent, and with a few tweaks to the build file could easily be improved. The build speed is a little on the slow side, but this is because the Z-resolution is quite high so is the price you pay for a quality part. Because there’s so much freedom in the software, you can play around with this and other settings to reach whatever compromise between quality and speed you think is good.
When looking at the quality of parts built by 3D printers, most of the differences are because of the software used, the real art of 3D printing is in the preparation of CAD models (STL files) to turn them into parts. Where the Select Mini excels is in giving you so much freedom in software choice that you can learn the real skill of 3D printing part preparation and you can learn how to produce very high-quality parts.
The scroll wheel takes a little getting used to. It tends to sometimes move to a different menu when you don’t want it to or go the opposite way to what you want, not a major concern but more of a quirk.
Negatives
Although Monoprice state you can build using ABS filament, I have to say my test pieces were not that successful and I think it’s because the heated bed does not get hot enough. The specs state a max bed temperature of 140°F but ABS really needs something closer to 220°F. If you really think you need to print ABS parts then I would suggest looking at a different machine. But this fact should not undermine the quality of this printer when using PLA material, I would suggest thinking of this as a PLA only printer and for that, it is still a bargain.
Verdict
If you’re looking to buy a first 3D Printer for a teenager, don’t look any further than the Monoprice Select Mini. It is outstanding value for money at around $200. This printer has its quirks but nothing that would make you regret buying it. If your kids have shown any interest in engineering and you have just the smallest amount of practical ability to fix the odd thing that might go wrong then this printer is a winner.
Engineering is about solving problems, and this 3D printer is a tool that allows you the power and freedom to do just that, and I’m confident it will turn almost any curious young mind into an Engineer. Bargain of the year!
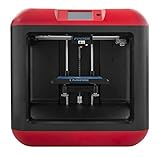
FlashForge Finder
Best hassle-free budget option for non-tech savvy folks.
Important Specs:
- Age Group: 11+
- Price Range: Budget High End
- Filament Type: PLA
- Resolution: 0.08mm – 0.4mm
- Build Size: 5.5 x 5.5 x 5.5 inches
First Impressions
Out of all the 3D printers in this test, this is the one that looks most like it was designed for everyday home users. Its chunky red plastic frame gives it a satisfyingly sturdy feel, the motors and drivetrain are mostly hidden away and while it looks quite futuristic (I half expect the 3D parts to be teleported onto the print bed rather than printed!). It also just doesn’t look out of place sat on my desk next to the everyday tech of today, if it weren’t for the noise I wouldn’t mind having this sat in my living room.
On the front of the machine is a beautiful clear color touchscreen, overall the Flashforge Finder looks decidedly unintimidating which is great for less tech-savvy folks.
Setup
A user manual is included on the USB stick that comes with the printer. However, on first use the touch screen handily walks you through the initial setup of leveling the print bed by telling you to screw the adjustment nuts fully down by hand and then one by one as it measures each corner it tells you to raise each nut until a beep informs you the correct height has been reached. This is a really smart but simple system that turns what could be a frustrating process into a complete doddle.
Loading the filament was a little trickier just because quite a lot of force is required to pull the filament through the extruder and the guide explicitly states not to use too much force! Getting this right on the first go is unlikely but once you know how it should feel it’s not a problem.
Software
The Finder comes with its own FlashPrint software for preparing (slicing) models. I think it’s pretty good, the fully automated slicing and support generator work well, and manual options such as temperature and printing speed are available for when your kids want to move to the next level of part design. Standard features like material usage estimates are included. Using the manual settings, FlashPrint is much more advanced than the XZYware that comes with the daVinci miniMaker. This should give most teenagers enough freedom to create before they decide that 3D printing is their dream career and start begging you to buy a BCN3D Sigma…
FlashPrint also has a few gimmicks such as ‘2D to 3D’ which allows you to make an approximate 3D model from a 2D image, for example, you can turn a photo of your face into a model, while this isn’t going to work perfectly it’s a fun enough exercise.
Printing
This is really a hassle-free 3D Printer. Using default settings my first build completed in a little under an hour. This is the only 3D printer I’ve had to check on to see if it’s working as it’s so quiet! Heat up time is fast, being able to remove the plate to apply blue tape is a dream.
One of the simplest yet most useful features of this printer is the removable build plate! It’s crazy that this isn’t a feature on all consumer-oriented 3D printers. Being able to remove your parts from the build plate while it’s sat safely on your desk is so much easier than reaching inside the machine. It just feels like a better way for kids to see their builds removed from the printer with a gentle slide it creates a ‘wow’ moment rather than 15 minutes of frustration as you deal with scraping bits of tape in a confined space.
The failure rate of builds on this printer is also fantastic, very near zero for me after a couple of weeks of use which is very impressive.
Negatives
Although the FlashForge Finder is happy to accept other brands of PLA filament the on-board filament holder is a little smaller than standard and so if you do choose a different brand you will need to keep the spool holder away from the machine for example on a shelf to the side or above it, in fact, there are some cool spool holder designs available on Thingiverse so you can make your own!
Verdict
The FlashForge Finder is the type of 3D printer that in a few year’s time you’ll be picking up from Target and Staples without a second thought just like you do now with a 2D printer. It’s pretty much plug and play and combined with excellent support from the manufacturer it’s the ideal choice if you want to give your family a hassle-free entry into the world of 3D printing. It also has enough flexibility that it will be a good few years before your teenager’s skills grow beyond its abilities.
I also want to add that many owners have reported the customer service at FlashForge to be outstanding with very prompt and helpful replies to customer queries usually received within just a few hours. This is especially important as you start to experiment with new filaments and more advanced slicing things can go wrong, so it’s comforting to know genuine help is an email away.
Sindoh 3DWOX DP200
Best for completely hassle-free 3d printing.
Important Specs:
- Age Group: 13+
- Price Range: Upper
- Filament Type: PLA, ABS
- Resolution: 0.05mm – 0.4mm
- Build Size: 8.3 x 7.9 x 7.4 inches
First Impressions
Unlike most 3D printers, you’ll notice the DP200 looks more like a home appliance than a piece of laboratory equipment.
The large see-through front opening makes it look something like a futuristic microwave!
All the mechanisms and filament spool are contained within the printer, so from the outside, it’s clear this is a 3D printer designed for using rather than tinkering with.
The plastic panels that hide the internal systems feel very solid and give you a good sense that this is a well-tested product.
Since the filament is contained within the printer body, it’s a little larger than some of its rivals. But its uniform cube shape makes it much easier to keep on a desk beside you than more open designs that need space for you to access filaments and removable covers.
The larger footprint thankfully means the DP200 also has a very generous build volume. At 8.3″ x 7.9″ x 7.3″ it’s one of the biggest for a home spec 3D printer. So if you have some large models in mind the DP201 will cope well.
Setup
The DP200 comes fully assembled, so the first steps are plugging it in, adding the filament and calibrating the bed.
Like the FlashForge Finder, the color screen guides you through the calibration process. This makes it a super easy task.
One of the major benefits of the 3DWOX DP200 is that the filament comes in a cartridge that you simply slide into your 3d printer, much like a conventional paper printer.
This filament cartridge system massively simplifies one of the main manual processes that other 3D printers suffer from. This means you’re much less likely to suffer from problems due to improperly loaded filament as well as making the process only take a matter of seconds.
Thanks to all these innovations built into the DP200, going from unboxing to your first 3D print shouldn’t take more than about 20 minutes!
Software
The DP200 comes with Sindoh’s own 3DWOX Desktop slicing software. It has two modes, easy and advanced, which give you as much control over your file preparation as you want. The easy mode is well-designed and will give you reliable, quality prints in most circumstances.
As you learn more you can move to advanced mode and start playing with the settings to understand more about 3D print preparation and even further improve the quality of your prints.
You can also use the free and highly regarded Cura software with the DP200 using its built-in profile that will give you optimum settings for the printer.
Printing
Once you’ve sent your 3D print file to your printer, there isn’t any more to do other than press start.
You can even watch the progress of your 3D print remotely, thanks to a built-in webcam inside the printer!
Although it sounds like a bit of a gimmick, it’s actually quite a useful feature that allows you to go about your life whilst just periodically checking your prints progress.
The DP200 is a quiet 3D printer, at around 50 dB, the fully enclosed workings sound similar to a normal office printer.
Once your prints are done, removing them is very easy thanks to a flexible and removable print bed. You just have to bend the bed and the prints will peel off.
Using the standard quality settings, the print quality is fantastic. Small details are rendered perfectly with just a hint of layer lines.
At maximum quality, a layer thickness of 0.05mm is achievable which results in stunning part quality that you are unlikely to be able to fault.
Negatives
The DP200 will only work using Sindoh’s own filaments. This means you are limited to the colors and materials that they choose to make available. This is done to ensure you only use filaments that will work reliably in your printer.
Fortunately, the Sindoh filaments are of high quality and will result in the most reliable prints. Unlike some other proprietary filaments, they are also very competitively priced and you don’t have to buy a whole cartridge each time. You can simply buy a refill spool that you insert inside your existing cartridge.
Since the DP200 can print with ABS, you need to think about ventilation, as the fumes given off are mildly toxic. Because of this you should keep it in a living area that has good ventilation or invest in an air purifier. See my article on ventilating your 3D printer.
Verdict
If you don’t mind splashing the cash, then you can’t really go wrong buying the Sindoh 3DWOX DP200. It’s hugely capable, a near professional-grade machine that just won’t let you down. It’s designed to be completely hassle-free to use, taking all of the worries out of choosing a 3D printer.
If your teenage son or daughter already has some 3D printing experience. Or they are keen on other areas of Engineering or are planning on studying an Engineering related subject at school, then this is a great gift for them. It will no doubt inspire them and give them a big head start in the world of Manufacturing and Design.
The DP200 is also an excellent choice for parents who want to treat themselves! Learn how to use it yourself and then teach your kids what you know. 3D printing is a very rewarding hobby that thousands of adults are taking up, don’t let your kids have all the fun!
Summary
XYZprinting da Vinci miniMaker
My Verdict: Best for young children aged 8+
Monoprice Select Mini V2
My Verdict: Best for teenagers who are already interested in Engineering or with tech-savvy parents to fix problems
FlashForge Finder
My Verdict: Best for teens and parents who want a no-hassle plug and play printer
Sindoh 3DWOX DP200
Best for completely hassle-free and high-quality 3d printing.
-Dylan
Last update on 2024-04-19 at 15:43
Hi. Thanks for the website and info – very helpful. I’m considering buying a 3D printer for my kids. They have used 3D printers at school and camps. Looks like the FlashForge Finder would be a good choice.
While my kids are pretty sophisticated, I am not. I am trying to understand what I would need to have on-hand to make this “work” in practice at home. For example, the description says I need software. Does that need to run on an actual PC? Is that the only way to make hte printer work? Or can you design an object and simply hit “print” and send it to the printer?
Said another way, what does the workflow look like? Can they go to Thingaverse, pick a project and then send to the printer? Or do I need to be able to run specific software on a PC (which I’m not set up to do)?
If there’s a primer somewhere on how to make this actually work at home that would be fantastic. Thanks!
Hi Matt,
The most straightforward workflow would require a PC/Mac or laptop and is as follows:
1a. Download 3D Model from Thingiverse (or similar web repository)
or
1b. Design 3D Model using software such as TinkerCAD (free)
2. Slice 3D Model using free Slicer software that comes with your 3D Printer (This is the process of turning your 3D Model into a G-code file that your specific 3D Printer can understand and print)
3. Transfer file to 3D Printer (on most 3D printers this can be done via WiFi, USB Cable, Memory Card, Ethernet, or Cloud)
If you don’t have a computer then there are ways to get a 3D Model directly from a web repository to your printer. If this is the case I would check out https://polar3d.com/ you can sign up for free and see if the 3D models they have are of interest to you and your family. Note you need to make sure the 3D printer you buy is compatible with cloud printing, the FlashForge Finder is.
Hope this helps! Feel free to ask more questions.
Dylan