This page may contain affiliate links. As an Amazon Associate I earn from qualifying purchases.
Great Software is the First Step to 3D Printing Your Designs
3D Printing Software is the magical link between the designs in your head and them coming into reality on your 3D Printer.
When deciding which software to use you need to choose the one that will enable you to create the designs you wish to the standard you want but with as little time and effort as possible.
3D Printing Software can be divided into two categories:
3D Modeling is the CAD software where you design your object.
A Slicer is software that prepares your 3D Model for 3D Printing.
3D Modeling Software
The first step to creating your 3D Printed part is to design a 3D model on your computer.
There are two types of 3D Modeling software you should look at. For most designs, you can get what you’re after with a traditional CAD package (Computer Aided Design) where you build up an object from wireframe and surfaces.
For more a more artistic feel you should use Sculpture Software, where you manipulate shapes like you would with wet clay.
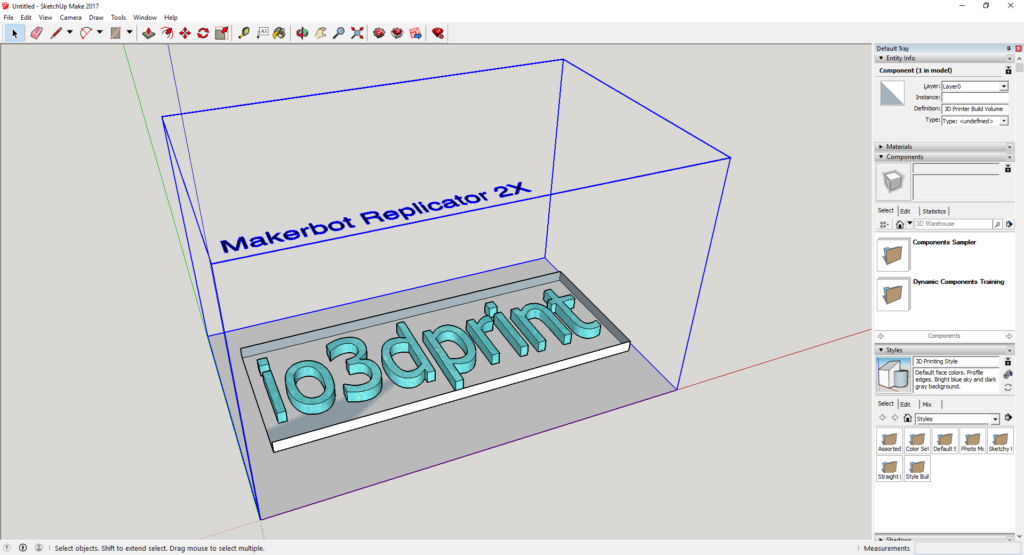
SketchUp
SketchUp’s power is in its simplicity. You will be able to draw 3D objects successfully on your first go with this software. Thanks to its intuitive push-pull way of manipulating shapes, it’s very easy to quickly create quite complex shapes.

Drawing in 3D is easy as you can manipulate shapes by clicking and dragging them to morph them into the shape you want. Whilst plenty of shortcuts allow you to easily duplicate and modify your designs so you don’t have to do anything twice.
Great for Beginners
A large library of free 3D models is included. By loading existing designs and being able to modify them to your liking you can have the quickest way to get started in 3D design.
Once you start creating more advanced models with an engineering bias you will start to reach SketchUps limits. Say you’re designing an RC drone, you will notice SketchUp becomes less intuitive and requires more effort to get what you need than a pro CAD software as Solidworks does.
Say you’re designing an RC drone, where it’s important multiple parts are correctly sized and fit together, you will notice SketchUp becomes less intuitive and requires more effort to get what you need than a pro CAD software as Solidworks does.
All this for Free?
There are free and paid versions, named Make and Pro. For most 3D printing projects you’ll get a lot of use out of the free Make version, so it’s well worth downloading it and giving it a try.
The paid Pro version adds in a commercial license if you plan on selling your designs as well as enhanced exporting options.
SketchUp is a comprehensive CAD package with a gradual learning curve that will graduate your skill level from beginner to pro.
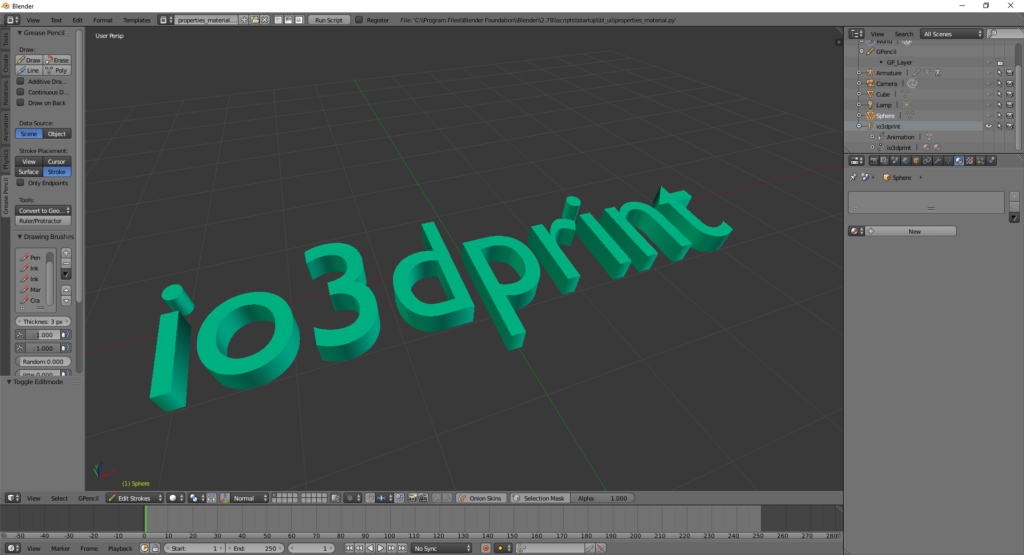
Blender
Blender has become one of the most popular software choices for 3D Printer users. It’s an immensely powerful package which gives you the power to draw anything you can imagine.

Blender is far from your average CAD program, with its ability to create professional level animation and gaming with photorealistic rendering.
Modeling and Sculpting
As a 3D Printer user, you’re best off using Blender’s powerful Modeling and Sculpt modes.
In Sculpt mode, rather than editing individual points and lines, you shape the surface of your model using a brush, just like sculpting in clay.
The sculpting brushes come in different shapes and varieties such as ‘Crease’, ‘Smooth’, and ‘Grab’ which allow you to shape your model in exactly the way you need just as if you were using your hands.
In Modeling mode, you draw objects from primitive shapes (like a cylinder or a cube), points or curves. This mode allows you to create anything from the simplest square box shape up to the most complex wireframe controlled NURBS surface.
Fast Modeling
Blender also offers some interesting tools like Metaball, which allows you to join lots of basic shapes together quickly as a starting point for your model.
Imagine you were going to create a man figure in clay. You would make a sphere for the head, a rectangle for the body and four sausage shapes for the limbs.
Blender allows you to do exactly this, creating a starting point for your model in seconds. Something that would take many minutes in most other 3D modeling software.
Tinkercad
I recommend anyone new to 3D modeling has a go with Tinkercad first.
It’s the perfect first choice for anyone new to 3D modeling and is particularly good for kids.
Its browser-based UI is an intuitive design that allows you to create 3D models by building them from basic blocks of shapes like cylinders and rectangles.
There’s a large library of pre-made models to pick up and modify yourself. And there’s a good library of tutorials available to get you up to speed in no time.
Compared to SketchUp and Blender, Tinkercad is very limited, and you’ll soon want to check out a more advanced modeler but for beginners.
However, there really isn’t any software simpler or more intuitive to pick up and knowing its target market it’s hard to fault it.
ZBrush
ZBrush is a somewhat niche software for 3D printer users. It has limited use for most applications but it excels above all others for sculpting figures. If you want to 3D print tabletop miniatures then this is the software for you.
ZBrush has many features that enable you to sculpt figures quickly and easily. Surface noise allows you to apply noise types to a surface with any brush type. For example, rust or chipped paint effect can be quickly applied to a surface, modified if necessary and just as quickly removed without affecting the underlying geometry.
For example, rust or chipped paint effect can be quickly applied to a surface, modified if necessary and just as quickly removed without affecting the underlying geometry.
Another feature useful for sculpting figures is Panel Loops. These convert your model into panels of polygons with a defined beveled edge. This allows you to really easily create armor or a machined metal surface.
Slicer Software
Once you’ve created your 3D Model you need to make it 3D Printable using a Slicer.
Slicers all perform the same essential functions to ensure your 3D Print is as close to your original design intent as possible.
Get Slicing
Firstly, you can orient and scale your 3D Model to get the best possible build orientation. This helps improve the quality and accuracy of your 3D Printed part and helps to reduce the chances of a failed build.
Next, you can determine the structure of your model. To save build time and material usage you can shell or hollow out your 3D Model as much as possible whilst maintaining the same structural strength.
Most Importantly
Build supports and rafts are next. These are the essential props that support your 3D part as it’s being printed. This is one of the main areas where good Slicer Software will make your life so much easier.
And finally, your Slicers main job is to chop your 3D Model into hundreds of thin layers and convert it into the 3D Printer language of ‘g-code’ so you 3D Printer can understand it and know how to build it.
Choose Wisely
Although all Slicing Software can do these fundamental tasks, there is a lot of variability in how easy they make it and how effective they are.
Choosing the right Slicer Software can be the difference between a successful 3D Print and a frustratingly poor one. So it’s very important to pick wisely.
Cura (Free)
Cura is the most popular Slicer software because it’s easy to use, free and in most cases will perform a perfect job of preparing your model for the 3D printer.
I’ve always found Cura one of the easiest slicers to use. The design is very intuitive so even complete 3D printer newbies will be able to get to grips with it very quickly. And it is able to carry out most of the essential functions automatically, with little user input.
Limitations
In most cases, Cura will do a great job of preparing your model for the 3D Printer. But for complex models, it is possible to reach its limits.
One of Cura’s main weaknesses is in its lack of complex infill options.
If you are looking for complicated honeycomb infill structures for example then you will need to look beyond Cura to something like Slic3r.
I’ve also found the support structures to be usable but lacking in finesse. They’re a bit too thick which make them tricky to remove without leaving a scar on the print. This can be rectified by changing the Support Line Width setting but it’s a shame the default is not a little better.
Cura – Verdict
For beginners to 3D printing Cura is your best bet. It’s well designed, easy to use and will give perfectly good results 99% of the time.
As you become more experienced at 3D printing you will quickly learn Cura’s limitations; as you try to fix issues with print quality and efficiency and find the setting you need to change just isn’t there.
At that point, you shouldn’t hesitate to upgrade to either Slic3r or Simplify3D depending on how much value you put on obtaining the perfect 3D print.
Slic3r (Free)
Slic3r is an open source software first made available in 2011 and was born from the RepRap community.
It has a very enthusiastic following and there’s a lot of help available from the community of users.
Slic3r is a fantastic piece of software that gives you much more power to control the way you part is printed. This means you can extract the best quality and performance from your 3D printer for each part your build.
Slic3r offers two modes, Simple and Expert. Whilst Simple mode is easier to use it’s not quite as intuitive as Cura and offers little extra either. Expert mode, however, opens up a new world of settings.
Sequential Printing
You can also use Slic3r successfully to do sequential printing.
The usual way to build multiple parts on one build is to print one layer on each part at the same time.
i.e. Part A – Layer 1 > Part B – Layer 1 > Part A – Layer 2 > Part B – Layer 2.
In sequential printing, you print the entirety of Part A and then the entirety of Part B.
To do sequential printing your slicer software must know how large and where the printer hotend will be. Then it can ensure it won’t clash with the parts that have already been printed on the build.
The advantage of sequential printing is that if your print fails, you only have to re-build the part that is currently being printed rather than the whole build.
It also reduces the chance of your build failing and increases your part quality by reducing stringing and the chance of clashes as the nozzle moves across the prints to get from one part to the other.
Slic3r – Verdict
Slic3r is a big step up from Cura in terms of features and options. This makes it a little too intimidating for beginners. Newbies are best off starting with Cura, but as soon as Cura’s limitations are reached you should jump to Slic3r, enable Expert mode and start playing with the hundreds of available options.
3D printing newbies are best off starting with Cura, but as soon as Cura’s limitations are reached you should jump to Slic3r, enable Expert mode and start playing with the hundreds of available options.
You’re unlikely to meet many limitations with Slic3r, however, you may find the occasional bug or problem.
In most cases, this won’t cause you too much of a problem. However, if you are 3D printing for business or value your 3d prints highly then it will be worth you upgrading to Simplify3D which offers most of the functions of Slic3r in a more refined and reliable package.
Simplify3D
Simplify3D is the only paid premium slicer software I recommend because it’s the only one that has noticeable advantages over the free options.
If you are selling or using your 3D printed parts for your business then it may well be worth you investing in Simplify3D to ensure you’re getting the best quality and reliability from your 3D printer.
If you’re upgrading from Cura or Slic3r using the default settings you’ll see a noticeable improvement in build quality and support structure generation. But it’s when you start changing things under the hood that you get the real benefits.
What marks Simplify3D above its competitors is the amount of tweaking it makes available to you. Whilst a lot of these settings are beyond the average user if you want to get the maximum quality from your printer you need access to all possible parameters.
Compatible and Fast
Simplify3D is compatible with more 3D printers than any other software.
It also has a number of pre-configured profiles. So if you have a popular 3D printer it’s likely you can use a built-in set of optimized settings, saving you hours of tweaking and testing.
Simplify3D is also the fastest slicer software available, completing most operations in a matter of seconds rather than minutes like its competitors. Again, this makes it ideal if 3D printing is your business.
To help you build multiple parts efficiently at the same time, you’ll find many options for multi-part printing, including sequentially. You can change the settings for parameters such as layer height and temperature for each separate part.
In the Detail
Simplify3D can solve problems that you’ve most likely seen on your own prints but are not able to fix because you don’t have enough control.
As a good example; blobs can occur when the extruder starts printing a perimeter section on your part and then returns to the exact same point to stop.
It effectively prints twice at the start and stop point which can be impossible to control in most other slicers.
There are two possible reasons for blobs appearing on your print and Simplify3D can solve them both;
Firstly, you can control the retraction settings so the extruder retracts more filament back into itself when it stops than it extrudes when it starts again.
Secondly, you can change the ‘coasting’ setting. This reduces the built-up pressure in the nozzle as it approaches the end of the perimeter it is printing.
In both cases, some trial and error is required but with a little patience having the ability to control detailed settings like this is the only way you can get absolutely perfect prints from your 3D printer.
Simplify3D – Verdict
Simplify3D is widely regarded as the ultimate slicer software. It has all the tweakable options you could realistically need, default settings that are superior to any other and it’s wrapped in a smooth and reliable package that is a joy to use.
It is only hard to justify paying for S3D because its competitors, Cura and Slic3r are so good for being free.
However, if you can justify the cost because of the value on your time or because you’re 3D printing for business then Simplify3D makes perfect sense and is excellent value for money.
I hope my 3D printing software recommendations have helped you decide which options to choose!
Dylan Miller


Nice article, and I like S3D too. I’d like to do sequential printing on my Zortrax M200+, and don’t think I can do it with their software (or can I)? So, is it possible to use S3D software with Zortrax.
Thanks,
Maynard