
This page may contain affiliate links. As an Amazon Associate I earn from qualifying purchases.
Finishing and Painting 3D Printed Gaming Miniatures
Introduction
When you have mastered the art of the 3D printing miniatures with all their tiny details, it’s then time to take them to the next level with a pro-level cleanup and paint job.
As with anything worth doing well, the devil is in the detail. So, the cleanup is not to make it look injection-molded, but to take away print lines without detracting from the appeal of a 3D model.
It is very satisfying to put your stamp on your miniatures, and many people find it quite therapeutic too.
Tools for Cleaning Miniatures
To clean and paint your minis, you will need some tools and materials. Picking the best 3D printer for miniatures will mean your minis will have the best start with limited build lines and precise details, but you will still need to clean them up to make them look their best.
I recommend you wear a dust mask and protective gloves when doing any work that involves dust, paint, and chemicals.
We will begin with a look at all the necessary items, and then have a walk through the ‘how-to,’ I will also add some links to video, discovered in my research, which are well worth a peek if this is, or is going to, be your main hobby interest or business.
Toolkit
First off, a good toolkit is a worthwhile investment. You can’t really tackle your miniatures with a vegetable knife and a scrubbing brush! So, give this kit a go, it will give you all the tools you need to remove any annoying excess bits of plastic, clean up detail, and delete sharp unwanted edges.
This is a 48-piece kit in a handy little bag giving you all the tools you need.

Next, you will need some consumable materials to give a perfect finish.
Filler
Wood filler is a great and cheap way to fill any unwanted gaps. There are other materials out there, but I chose this also because it’s non-toxic, and it is also easy to sand.
Acetone
Note another alternative to some filling and sanding is a small amount of acetone and a Q-tip, use this to smooth out unwanted lines. Acetone melts PLA and ABS, so you have to be careful and use it sparingly, but it is great for getting a glass-like finish.

Bondo Putty
A favorite in the 3D print community is Bondo, an all-purpose putty for filling layer lines and other imperfections.

An interesting rival to Bondo is XTC-3D for smoothing and finishing, this putty self-levels, it can be easily sanded, primed and painted, it’s not expensive, and you can also add colors and metals quite easily.
Follow the link below for the product website and see what you think.
https://www.reynoldsam.com/product/xtc-3d/
Sanding
You’re going to need sandpaper from the rough to the smooth, 100 to 600 grit is a useful combination to keep in your tool kit, along with a foam brush or a soft toothbrush, some lolly sticks and mixing cups, and a beautiful clean surface from which to work.
Choose a wipe-clean mat, and you can go from sanding to painting without contaminating your miniatures.
Airbrush
There is one more tool I can recommend, and that is an airbrush. This one is an investment for the serious 3D modeler. There are others on the market, but well worth doing your research as it is going to be the next most expensive item in your arsenal next to the actual printer.

Painting Tools
Finally, you should have your primer, paint, and varnish in your finishing kit, and for this, there is a whole range of options.
Acrylic and water-based paints work very well, though they often require a few layers.
This is an excellent choice for paint but whatever you choose to finish your miniature, remember that the paint job is only going to be as good as the preparation you give to the model at the start, so if anything looks off, don’t paint in the hope it will go away.

Depending on the theme for your gaming miniatures, there are all kinds of paint collections out there. For example, if your miniatures are military based, there is a specific kit for military use giving all the necessary colors for camouflage.
For spray paint, I recommend Dupli-Color and Grumbacher.

Primer tends to come in white, black, or grey, depending on your choice of finishing color. You can opt to use grey for most colors, and it will nicely show up spots you might have missed in the sanding process, so be prepared for more than one coat of primer.
I have only listed matte varnish here, your choice of course, but the matte does cut down the reflections and helps the detail to stand out.
Choose your materials carefully and take note of the instructions.
Miniature Cleaning Procedure
Here’s my step by step process for cleaning and painting miniatures.
Step 1 – Sanding
Take a fine-grit sandpaper 600 or higher, and gently begin to erase those build lines. You need to make the surface as smooth as possible. Sand in a tiny circular motion, you are trying to smooth the lines, but too vigorous a movement can leave trenches in the build lines or create sanding lines, which you obviously don’t want.
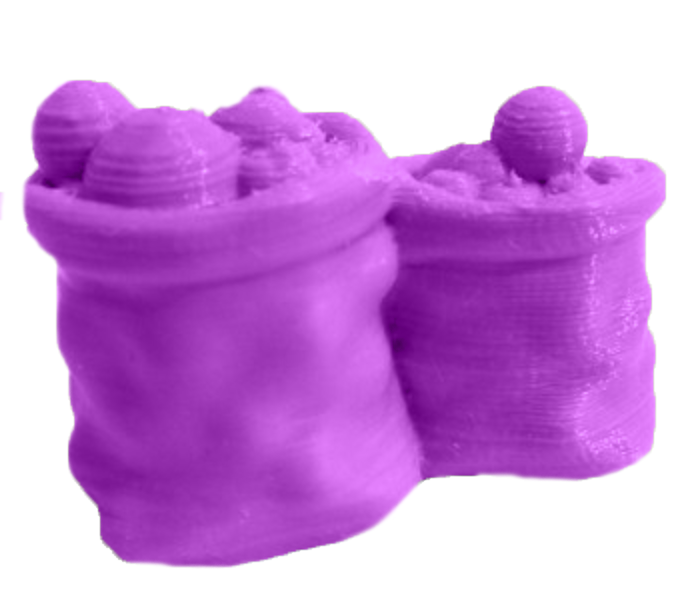
You can use the Q-tip and acetone mentioned earlier but proceed with caution. Depending on the material you used for your 3D print, the acetone can work too well and take away detail you need to remain. I’ve provided a picture below to show results. This is not a blurred photo; by the way, it is the effect the acetone gives.
Step 2 – Filler/Primer
After sanding, you may notice some tiny holes. These will look awful if you just skipped to painting, so now is the time for the filler. So fill and sand as much as you need to get a smooth finish devoid of sinkholes, and once you are done, drop the miniatures into some warm soapy water, give them a clean and leave to air dry. Clean up your work area and prepare for the next step, which is the primer.
Before using primer, be sure that your miniatures are totally dry and dust-free. Wherever possible, take your miniatures outside for spraying, and if you can set up your own little spray booth even better.
A cardboard box on its side and minus the lid is a handy way. You can even use hanging wire to suspend the model inside the box and turn it or just sit the model on the lid and turn the lid to spray all sides of the model.
Spray in short bursts from around six to twelve inches away from the model. Two coats are usually enough, too much primer will take away some of the much-needed detail, so you are aiming for a nice smooth coverage with the minimal amount of primer.
Allow your model to dry, minimum of 2 hours, but if you have the patience to wait, 24 hours is ideal. You can speed up this process with a small hairdryer.
If you are priming with a paintbrush, follow the same principle, and keep the coats to a minimum, keep the brush clean between coats so as not to contaminate your miniature with flecks of dry primer.
Step 3 – Painting
Painting, adding the color to your models, can be done in a variety of ways, the spray is one of the common ones and as simple and easy as the primer above. Use the same technique, spray from 6 to 12 inches away, you may need two or three coats, but it’s worth the effort.
If you are using a brush, opt for dry painting and small amounts on the brush, build up the color with each pass. Same goes if you are thinning your paints with water, use a tiny amount each time, and build up the color gradually. It is worth noting that thinning your paint out with water can actually speed up the drying process.
Step 4 – Varnish
To varnish, use the same technique as for primer and spray paint, you may need more than one coat, but you are on the last lap now, so patience is a must. Just think in layers from start to finish, and you won’t end up with blobs and drips, which can be tricky to repair.
Conclusion
That’s all you need to know to get the best finish from your 3D printed miniatures. The best way to learn is practice, so don’t worry about making mistakes, just get stuck in and give it a go!
Last update on 2024-04-24 at 17:31