This page may contain affiliate links. As an Amazon Associate I earn from qualifying purchases.
Review: Dremel DigiLab 3D45
Dremel Digilab 3D45
Summary
There’s a lot I like about the 3D45; it has a generous heated bed, fully enclosed design, direct drive extruder, filament runout detection, built-in camera, great software with no limitations. The only real negative is that third party filament is not supported by Dremel although with a simple workaround you can use them.
The 3D45 is a Dremel’s latest 3D printer and sits at the top of their trusted lineup.
All of Dremel’s 3D printers are designed to be safe and easy to use in a classroom or family setting, with features like auto-loading filament, HEPA filtration, and RFID material detection that ensures your budding engineers will not only have fun but will also be safe when they are exploring the exciting world of 3D printing.
With significantly upgraded heated bed and high-temperature extruder, the 3D45 can print a wide range of filaments in addition to standard PLA, including Dremel’s own ECO-ABS, Nylon, and PETG.
But that’s not all; on the 3D45 you also get a built-in HD camera combined with a browser-based software that automatically records time-lapse videos of your prints and allows you to view and control your printer remotely.
Although based on the 3D40, the 3D45 is definitely a step up from the previous 3D40 model.
Like Dremel power tools, the 3D45 3D printer is built to last, and when you take it out of the box, you can feel and see that quality materials have been used.
Dremel is a trusted brand in the world of power tools with a reputation for quality and reliability. This reputation has continued into their 3d printers which have become one of the go-to brands for schools and universities across the country.
Features
The Dremel 3D45 is loaded with all the basic features you’d expect to see, and some nice additions that make using the 3D45 a breeze. It’s a single extruder printer in a fully enclosed chassis.
The new extruder is a direct drive system with a nozzle can reach temperatures as high as 280C, and the print bed is heated glass that can reach 100C which will allow you to print most materials including ABS and Nylon.
The build volume is a generous 10” x 6.75” x 6″ which is 402 cubic inches and more than enough for most of the projects you are likely to throw at it.
HD Camera
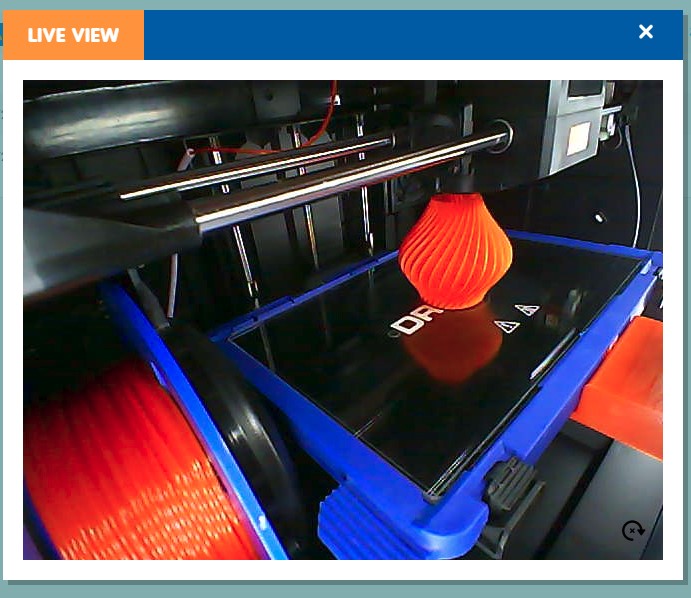
A nice feature that isn’t seen on many 3D printers is the inclusion of a 720p HD camera nestled away in one of the top corners of the printer. The camera function is very well integrated into the Dremel printing software which means it is fully automated and starts recording automatically with your first print.
You can quickly check the progress of your print either on your desktop PC/Mac or your smartphone, using the browser-based PrintCloud software. This great feature means you don’t have to remain in the same room as your printer.
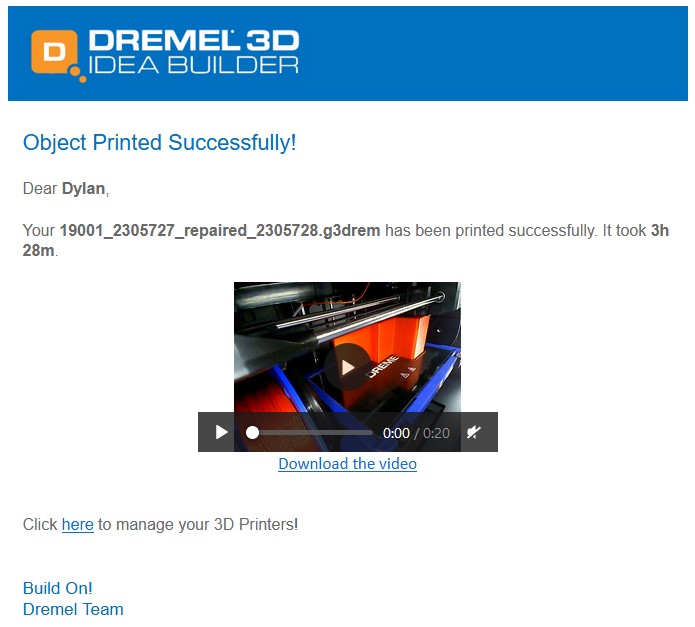
One of my favorite features of the 3D45 is that the camera automatically records a complete time lapse video of every print you make and emails you a link to it when the print is finished.
Print Cloud
One of the aspects of the 3D45 workflow that impressed me the most is the online PrintCloud 3DPrinter OS software. This software allows you to fully manage your prints and the printer itself from your web browser, this means your printer is connected to the internet either by WiFi or ethernet so you can control it from any room without needing to swap SD-cards or plug in USB cables.
I found the Cloud printing to be a real time saver compared to many of my other 3D printers, and made me much more likely to use the Dremel as I was always just one click away from 3D printing!
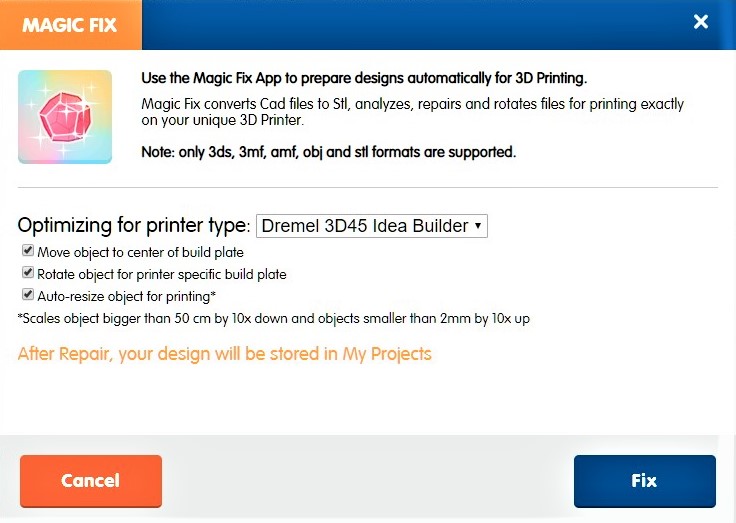
You upload the model you want to print by just dragging and dropping into 3DPrinter OS. You can then repair, slice, and send the file straight to your 3D45 for printing automatically at the click of a button.
RFID Reader
All Dremel filament spools are fitted with an RFID chip which the 3D45 can read. This tells the printer what type of filament is being used and the printer automatically applies the correct settings. This means there’s no possibility of the wrong parameters being used which could easily cause a print to fail or at least the quality to drop.
I played around with the proximity of the spool to the printer to see if there was any chance of the 3D45 misreading, especially if you have a stack of different filaments next to the printer. Fortunately, the system seems completely foolproof, and no matter where I waved spools around, only the once correctly fitted into the spool holder was read!
Touch Screen
The 3D45 is fitted with a 4.5-inch IPS touch screen in full color which gives it a large, clear display. I found it to be very responsive, with only a couple of miss-clicks in the three months I’ve been using it in my workshop.
The menu items are laid out in a very logical way, with good use of clear icons to help you navigate without confusion. There’s no hunting around in sub-menus to find a setting.
As you use the printer, you’ll notice plenty of helpful guidance pop up on the screen too, such as which direction to turn the bed leveling screws and warnings if one of the doors is left open.
Removable Heated Bed
The printer comes with a removable glass bed which is made of heat resistant borosilicate glass. The entire bed is easily removable with two clips at the front edge that you just press to unlock and then slide out the bed.
The front door opening is the full width of the printer, so maneuvering the glass bed with a finished print on it out of the printer is easy.
Being able to remove the print bed makes it much easier for you to remove your prints when they become stuck fast to the surface during printing. On printers that don’t have a removable bed, you are at risk of damaging the printer or yourself when trying to pry the stuck part from the bed as it can take quite some force to remove them.
Since the bed is made of glass, it’s easy to use a metal scraper to tease your print off the bed. Dremel includes a good quality scraper in the box with the printer.
Semi-Auto Leveling
I made a quick video of the leveling process which will show you just how quick and easy it is.
Leveling the bed on the 3D45 is really quick and straightforward. You select ‘bed leveling’ from the touch screen, and the extruder will move to the back center of the bed. A servo-operated switch will pop down, and then the extruder lowers until the switch engages, this tells the printer exactly what height the bed is.
The extruder will then travel to the front left corner of the bed and do the same check, this time, if the bed is higher or lower than the first measured point the printer will beep and ask you to turn the adjuster knob either clockwise or counterclockwise until the correct height is reached. The extruder then moves to the front right corner, and the check is performed again.
In total this check only takes a minute or so and is much more accurate and repeatable than the paper shim method many cheap 3D printers require.
Bench Testing
The 3D45 has been in my workshop for over three months now, and I’ve only had one single print failure in all that time!
I’ve found the quality of prints to be of a very high standard, with little in the way of imperfections on either the PLA, Nylon, or ECO-ABS materials.
That one failure was due to the bed needing leveling after I’d been rough handling it fitting a webcam…
After that failure I re-leveled, and the printer told me the left-hand side of the bed was too low. From then on, no more failures!
The first print I tried was one included on the SD-card with the printer. A happy looking frog. I decided to name him Warren. Most people will stick to the favorite PLA filament, so I printed Warren the Frog using the attractive slightly orangey-red PLA that Dremel included.
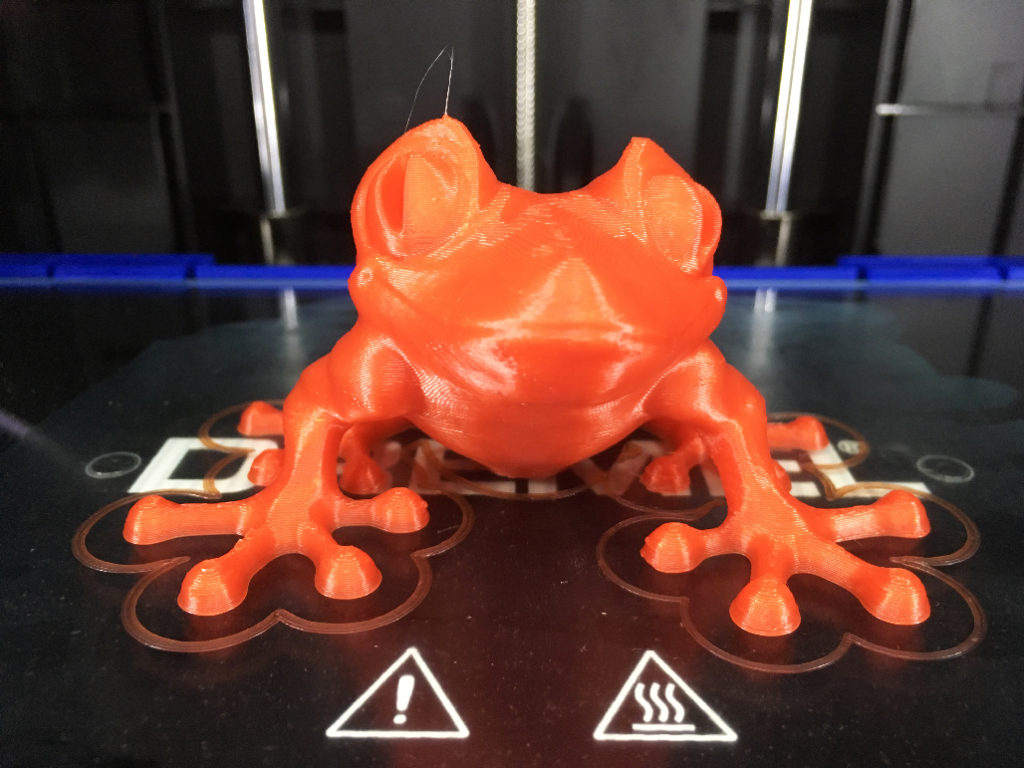
Warren came out perfectly formed with a quality finish and no imperfections.
The complimentary files that 3d printers come with are always highly optimized to work on that printer, so the next logical test to try is the ubiquitous Benchy.
I swapped filaments for Benchy, to test the ECO-ABS that only the 3D45 in Dremel’s lineup can print.
ECO-ABS isn’t an ABS at all but is actually a PLA filament that’s been heat-treated to make it much tougher, this means it has similar mechanical properties to ABS but without the downsides such as being difficult to print and it doesn’t give off harmful odors when heated.
Re-loading the filament is a breeze on the 3D45. From the home screen, you press filament and then re-load, and the display then walks you through the process of removing the old filament from the extruder and loading the new.
Once your new filament is in place, the printer reads the RFID that’s attached to every spool of Dremel filament and asks you to confirm it’s correct. For example, in this case, it merely states “Filament: ECO-ABS?” And you tap ‘yes’ to confirm.
This enables the 3D45 to apply all the correct temperature and extrusion speed settings to ensure you get the best possible print quality for each filament.
It’s a great system and especially suited to schools and family use where reliability and ease of use are of greater benefit than freedom of choice.
Benchy printed in ECO-ABS was ready after around 2 hours and again is hard to fault. There were three tiny strings, but these were easily removed with my fingernail, and there were no other imperfections. The layer definition is excellent and even.
Also, the cooling works very well, which contributes to the quality of the prints.
The prints finish without any flaws, and the printed objects need minimal cleaning up to remove any bits of the filament.
Proprietary Filament
Dremel encourages you to stick to their own brand filament. Since this printer is aimed at schools and family use, this makes sense as it eliminates any variability in filament quality you might get with a third-party brand which can cause your print quality to suffer or even fail.
The filament spool holder is sized to fit only Dremel spools, so if you do want to use third-party materials, you will have to print or buy an external filament holder like this one on Thingiverse.
Additionally, Dremel filaments have an RFID chip built into them which informs the printer which type of material is being used. This automatically changes the printer settings to ones that are optimized for that material.
Dremel’s filaments are available in 10 colors of PLA as well as several different material types including ECO-ABS and Nylon, so the only reason you’d need to think about using a third-party brand is if you want to use up your own stock or have a particular color or finish in mind.
Noise Level & Safety
The fully enclosed frame of the 3D45 makes it a very quiet 3D printer. The stepper motors are much less chirpy sounding than those on some of my cheaper 3D printers like the CR-10 so the main noise is a consistent fan hum, so I found it okay to have it running in my workshop while I worked on other things without finding it distracting.
While the printer is running the front door and lid should be closed to maintain a stable temperature inside the chamber. This also makes it safer to use around children than an open chassis design.
At the back of the 3D45, there’s a removable Carbon filter that filters all the air that is extracted from the printer making it safe for use in your home or school. You can also hook up an external extractor hose to the vent. There’s even a model of a hose adaptor included with the printer so you can very quickly take advantage of one of the best benefits of owning a 3D printer and avoid a trip to the DIY store!
Chassis
The 3D45 is a large printer. It measures 15.9 x 20.2 x 16 and weighs about 40lbs so you will need to make a suitable space for it on your desk.
The frame is entirely closed which allows the perfect micro-climate to be made for printing temperature-sensitive materials like ABS.
Access to the inside of the 3D45 is easy as there are two large see-through doors on the front and top of the printer, they are both almost the full width of the printer and open wide.
The build volume of the 3D45 is 6.7 x 10 x 6 inches, which is just a little bigger than MakerBot Replicator which costs much more and is much bigger than another close competitor the LulzBot Mini 2.
Dremel has a long-standing reputation for producing quality, reliable products and you can see that their 3D printers are designed and manufactured to the same exacting standards as their power tools, with every part having a quality feel.
Unboxing & Box Contents
The 3D45 is shipped in a large box that measures 23” x 23” x 19” and weighs 52lbs which makes it just about manageable by a single person on delivery.
When you first open the box, you will see the user manual and quick start guide right on top along with the glass bed.
It’s worth having a quick look through the quick start guide as it shows you the best way to remove all the protective packaging which could otherwise be a bit of a puzzle!
After pulling out the top cardboard packing lid, you will see the printer packed in a heavy-duty plastic bag. It’s nice to see that the four sides of the printer were packed with polystyrene to keep it safe in transit.
The 3D printer can be lifted straight out of the box with just enough room to get your hands down the side of the box to grab the base of the printer to give you something to grip.
After removing the plastic wrapped around the printer, you need to open the front door to remove more packing material under the print bed.
In this packing material, you will find two spools for the filament, one reel of nylon and another of ABS.
On the side of the printer, there is a hatch for the filament, and inside it, you will find all the cables and plugs for use in the USA and EU.
Here is the list of what is included in the box:
- Nylon filament
- Eco-ABS filament
- USB flash drive with slicing software
- Build plate
- Sticks of glue
- Removal tool
- Nozzle de-clogger
- Quick start guide
- User manual
Setup
The set up after unboxing is rapid and straightforward. A few minutes after switching the machine on for the first time, when the menu appears on the touchscreen, you need to set up your country and desired language. The 3D45 will then scan for WiFi networks, and you can set this up in the same way you would any other WiFi-enabled equipment.
The next step is to load your filament, which is a simple task. You have to place the new spool in the holder and insert the end of the new filament into the guide tube.
Now, you need to press the button “change filament” on the touchscreen. This will initiate the extruder to start heating up. Next step is to feed the filament into the extruder. It will begin extruding almost immediately.
The final and most straightforward part of the installation is to click the glass bed into place.
Now, you can move on to the bed leveling stage by clicking on the touchscreen. It is a semi-automatic process. The bed will start moving up closer to the head and begin the leveling process on the center rear of the bed.
A micro-switch drops down from the extruder and measures the height of the bed before moving to the front left corner to repeat the process.
If it needs some manual adjustment, the screen will show you to which direction you need to move the screw located underneath the bed. When the bed is level, you will hear a beep, and a tick will appear on the screen, meaning it’s right.
It will then move to the right front corner and repeat the same process.
The bed is now leveled, that simple!
To help the first layer of your print stick to the bed, Dremel includes a couple of sticks of purple color changing glue, just like the favorite Elmer’s brand. A quick wipe over with the glue-stick and you’re now ready to start printing.
Software
All necessary software is included with the 3D45. It comes with its own bespoke version of CURA with three different levels of assistance, from completely automated through to full G-code editing.
It is very easy for beginners as well as powerful enough for advanced users with a user-friendly interface.
My favorite feature of the 3D45 is the cloud printing solution that comes as part of the package called CloudPrint. This is a web-based interface that provides a home for all of the management of your 3D printer. You can upload model files, have the software automatically prepare and slice them from printing, and manage all the operation of your 3D printer.
After I’d been using the 3D45 for a few weeks, I found myself increasingly going straight to the CloudPrint OS rather than using the full CURA package as it was just so reliable and quick.
There are also a couple of neat features in CloudPrint; like the way it sends you an email every time a print has finished to notify you. It includes a link to a time-lapse video of the print, and when you start a print from CloudPrint, it automatically starts recording a video so you can keep an eye on progress.
Pros
- Printing can be paused if you need to take a break or for changing the filament to another color
- The 720p HD camera allows you to monitor your printer remotely
- Cloud printing takes ease of use to another level
- Print quality is excellent
- Interface is very user-friendly.
- Quick and easy to set up after unboxing
- The semi-automatic bed leveling works very well
- Can print tricky materials like ABS and Nylon
Cons
- Third-party filaments can be used but are not officially supported
- Fewer filament color options available in the Dremel brand
- No proper ABS filament offered by Dremel
- Not many options for upgrading or modifying
Conclusion
There’s a lot I like about the 3D45; it has a generous heated bed, fully enclosed design, direct drive extruder, filament runout detection, built-in camera, great software. And the only real downside to it is that it doesn’t officially support third-party filaments, although you can use them with a couple of workarounds.
On a big brand 3D printer like this you would expect there to be many settings locked down to reduce customer complaints, but all credit to Dremel, the CURA software is as complete as the open version with every setting and tweak available to you if want it.
From the moment you open the box you can see that this is a quality 3D printer that has been designed thoughtfully.
As a customer Dremel really makes you feel looked after. The proper documentation manual is a nice touch that you don’t get with many 3D printers, and the online help is also very clear and well thought out.
In an educational environment or as a family 3D printer it’s hard to think of any better choice than the 3D45.
I can imagine the only people who wouldn’t be happy with a 3D45 would be DIY tinkerers who like to play around with upgrading the hardware. In the case of the 3D45, there really isn’t much that needs improving even if you wanted to!
More like this please, Dremel!
-Dylan
Specifications
- Build Volume: 10″ x 6″ x 6.7” (170mm x 254mm x 152.4mm)
- Nozzle diameter is 0.4 mm
- Full-color touch screen: 5 inches
- Nozzle temperature up to 280°C
- Removable glass build plate: up to 100°C.
- Filaments compatible: PLA, Nylon, Eco-ABS, and PETG
- Built-in HD camera
- Wi-Fi connectivity and included remote printing software
- Integrated RFID technology to identify filament
- Dremel DigiLab 3D Slicer software included for Windows or Mac
- Minimum layer height: 50 microns (0.05mm)
- Build plate leveling: Semi-automated
- Removable Carbon Filter
Last update on 2024-04-25 at 08:39