This page may contain affiliate links. As an Amazon Associate I earn from qualifying purchases.
Review: Monoprice MP10 Mini
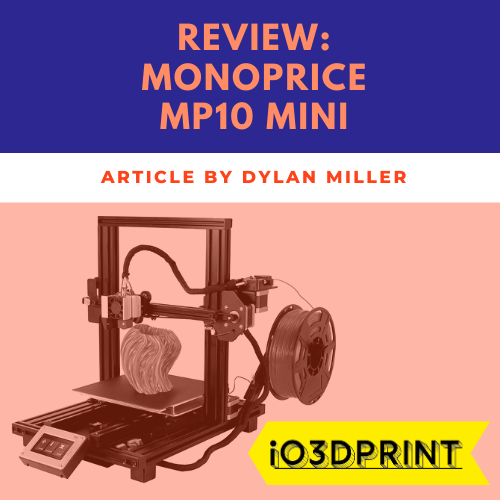
Monoprice MP10 Mini
Summary
The MP10 Mini packs a lot of features into a small package. Building on the popular V-slot aluminum extrusion style frames of the Ender 3 and CR-10, Monoprice has thrown every feature they can at the MP10 Mini which makes it stand out from the crowd and offer good value for money.

The MP10 Mini is Monoprice’s version of the popular CR-10 style 3D printers. Like the CR-10 it’s made from sturdy V-slot aluminum extrusions that are the key to both its structural integrity and low price.
In a departure from the CR-10 and Ender 3 style, the PSU is mounted underneath the printer which makes it appear neater and take up a little less desk space.
It features a generous 200mm x 200mm x 180mm print volume and plenty of features to make this a worthwhile upgrade.
As you may know, Monoprice rebadges 3D printers made by other companies and the MP10 Mini is effectively a re-badged Malyan MA10 but with a couple of tweaks. Compared to the Malyan it has improved low noise fans, a better filament sensor, and a different bed heater.
In this review, I’ll take a look at what new features the MP10 Mini has to offer and whether it stands up against the stiff competition in this price range.
Pros
- A lot of features for the price. All-metal hotend, Filament sensor, and assisted bed-leveling are impressive at this price range.
- It is accompanied by a very helpful manual. All you need to do is follow the stipulated steps very carefully and you will be on the go in no time.
- The build of the MP10 Mini is very sturdy which will result in accurate, reliable 3D printing.
- The unique Magnetic print head is a rather remarkable innovation. It is something worth emulating considering just how much it simplifies the whole exercise of cleaning/maintenance.
- It has an easy touch screen interface
Cons
- Some users have had issues getting WiFi to work. This seems to be especially the case for dual-frequency WiFi networks (5GHz and 2.4GHz) which has been a problem on other Monoprice printers in the past.
- The fans are somewhat loud and more so the fan of the power supply
Features
The Monoprice MP10 Mini comes with numerous features that make it stand out from the competition. Together these features make the MP10 easier to use and more reliable.
Assisted Leveling Sensor
The first feature is the assisted leveling sensor which is an inductive sensor first seen on the Select Mini Pro. This makes it much easier for you to detect errors in the height of the print bed which is always tricky but especially on larger print beds like this one. The assisted leveling allows you to easily set an accurate Z-offset all over the bed which ensures your first layer is successful every time.
Heated Removable Print Bed
The second feature is the heated, removable print bed which is also quite flexible as it is made from spring steel. This allows you to print an array of materials that require the heated bed while also making it much easier to remove prints without damaging them.
The flexible layer is entirely removable and simply attaches to the heated bed by magnetism, making it super easy to remove and replace.
Dual Y-Gantry
The third feature is the dual Y-gantry and this provides stability. This helps minimize the wobble that is often experienced with most 3D printers that are single Y gantry design. Remember that this function is critical since it guarantees you the production of some accurate and clean prints. Also, you won’t have to keep leveling over and over again.
Removable Magnetic Extruder
The fourth feature is the removable magnetic extruder. This is unheard of on a 3D printer in this price range, so it is a welcome addition. The extruder is made up of an assembly, the extruder itself and a carriage that remains on the printer. The two are fixed together with three strong neodymium magnets and two dowels for a precise location.
Belt Tightness Adjustment
Another nice feature of the MP10 is built-in belt tightness adjustment for both X and Y-axis. This is again unusual on a 3D printer at this price range.
2 Screw Hot End Removal
Removing the hot end to change nozzle size or clear a blockage is easy with the simple 2 screw attachment.
Specification
- Build Volume: 200 x 200mm x 180mm
- Speed: 100mm/sec
- Layer Resolution: 50 micron
- X Resolution: 50-200 micron
- Z Resolution: 100-300 microns
- Bed Max Temp: 110C
- Max Extruder Temp: 280C
- Filament Type: 1.75mm
- Control: 3.5″ Touch Screen
- Extruder: an all-metal extruder
- Connection: Micro USB, microSD card, Wi‑Fi (2.4GHz)
- Materials: PLA, PLA+, Wood, ABS, PETG
Print Quality
This MP10 Mini produces some nice prints. It can print a layer accuracy of about 50 microns. The improved Y-gantry combined with the sturdy aluminum extrusion frame help to maintain its accuracy.
Customer Service/Community
A large number of customers that bought the product were impressed with the nature of the customer services. The services were offered around the clock. They enjoyed fast customer care services. There were also a lot of reliable channels to reach the provider to ask questions.
Unboxing
The first thing you need to do is remove your printer from its box. Don’t forget to remove even the zip ties and the tape. Ensure that no parts are missing, then you can start assembly. The box contains the following parts:
- USB Cable
- AC Power Cord
- 5x M5x20 Screws
- MP10 Mini 3D Printer
- Filament Rack
- 5x M4x6 Screws
- Plastic Scraper
- Open End Wrench (8mm)
- Memory Card
- Hex Wrench (2mm, 2.5mm, 3mm, 4mm)
- User Manual
Set up
The MP10 Mini is almost fully assembled when it arrives but there is a small amount of assembly and setup you have to do before you can start printing.
To make it easier to ship, the two main components of the printer are separated, so you have to screw them together. All the screws and tools you need are included in the package.
It’s vital that all elements of the printer frame are square and true to each other, so having a bit of patience at this stage will save you possible problems when you come to print.
The Z-axis lead screw will need locating and fixing into the stepper motor coupling. This is a key step that is easy to get wrong so you should spend a few minutes checking it is correctly located, concentric and rotates smoothly before tightening the bolts.
The final step is to attach the LED display to the printer’s frame and connect the ribbon cable.
In Use
The first thing after the set up is to power on your device. You will need to do some calibrations when getting started so that you can achieve the best prints. Use the auto-leveling button to set a level gap between the nozzle and the print bed.
Heating the nozzle before exerting the filament into the extruder makes the process easy. By following your manual properly you will do a lot of these things easily. In this case, you will press the nozzle button and settle for the right temperature.
The filament type you are using is what determines the temperature value that you set.
Verdict
Whether you’re a beginner to 3D printing or are looking to upgrade, the MP10 Mini offers many features that make it not only easy to use but more reliable and more accurate.
For beginners, features like assisted leveling and the magnetic print bed will make your introduction to 3D printing a lot easier and less give you less hassle.
The product is intended for the beginners. They have it easy because of the “assisted” leveling property of this tool. When you purchase it, you will only need to make very few adjustments to obtain some impressive prints. Asides from that, the Printer is so easy to set up and thus you won’t waste a lot of time.
-Dylan
Frequently Asked Questions
Does the MP10 Mini have an auto-resume after a power failure?
Yes, it does. There are a few reports online of it not having this feature because it isn’t mentioned in the specs, however, if you do suffer a power loss a recovery file is created and the printer can resume from where it left off.
Is the MP10 Mini a rebadge of another 3D printer?
Yes, it’s a re-badge of the Malyan MA10 but with a couple of tweaks. Compared to the Malyan it has improved low noise fans, a better filament sensor, and a different bed heater.
What are some of the things I stand to gain by buying the MP10 over other 3D printers?
- Very easy to assemble
- A very helpful manual to guide you through assembly and set up
- A number of features that make 3D printing easier and more reliable like assisted auto-leveling, flexible bed, adjustable belts.
How does the Monoprice MP10 compare to the Creality Ender 3?
Both of these 3D printers are quite similar in their specs and design. The Ender 3 has a very large community around it which is not to be underestimated as a big plus point when buying a 3D printer. On the face of it, the MP10 appears to have better quality control compared to the Ender 3 but fewer resources to go to if something does go wrong.
Last update on 2024-04-25 at 16:59