This page may contain affiliate links. As an Amazon Associate I earn from qualifying purchases.
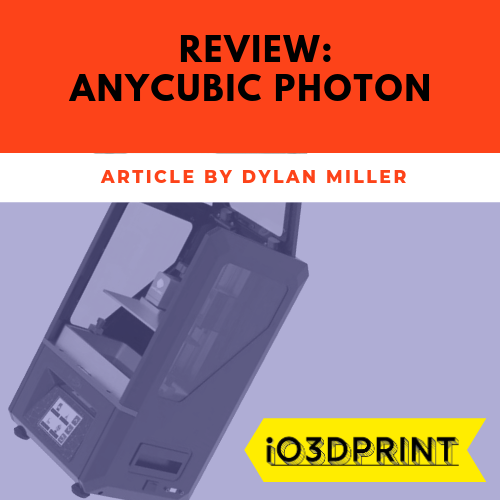
Review: Anycubic Photon UV
Anycubic Photon UV LCD
Summary
Since it was released, the Anycubic Photon UV LCD has been gaining a lot of popularity across the 3D printing community for printing miniatures and jewelry. At this price, the Photon is going to revolutionize the SLA/DLP 3D printing sector.
The Anycubic Photon isn’t the first low-cost consumer SLA style 3D printer, but it is the first that has proven itself to be not only cheap but also very reliable.
A wonderful thing has happened in the world of 3D printing. The incredible technology of liquid resin 3D printing has suddenly become very affordable.
In fact, it’s quickly become one of the most appealing 3D printers on the market today. Many people who already own an FDM 3D printer are investing in a Photon as a second 3D printer because it allows you to print a level of detail that just can’t be achieved on FDM printers.
Anycubic has been at the forefront of producing reliable and affordable FDM printers that are packed with top of the range features. In terms of price, the Anycubic Photon is considered to be the cheapest DLP 3D printer that actually works reliably.
Since it was released, the Photon has been gaining a lot of popularity across the 3D printing community. At only around $500, this machine is going to revolutionize the SLA/DLP 3D printing sector.
Pros
- Affordable SLA/DLP printer
- Easy to set up and use
- High-quality prints
- Good software
Cons
- Small print volume
- Lots of clean-up required
- Liquid resin is toxic and messy to use
Verdict
If you are looking to 3D print highly detailed parts like gaming miniatures, then there’s no better method than liquid resin printing.
The Anycubic Photon has truly revolutionized the world of DLP 3D printers by merely creating a genuinely reliable and easy to use DLP 3D printer for a budget price.
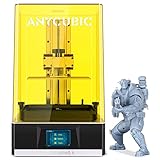
It is robustly built and packed with impressive features that can only be matched with high-end printers costing many times more. Since it is fully assembled, the setup process is very intuitive, and there is a growing community of owners who have created lots of great YouTube videos and guides to getting the most from the Photon.
Specification
- Screen: 2.8-inch touch screen
- Slicer software: Anycubic Photon Slicer
- Connection: USB
- Technology: DLP
- Available film color: Blue and orange
- light source: Integrated UV light (405nm wavelength)
- XY DPI: 47um (2560 x 1440)
- Y axis resolution: 1.25um
- Layer resolution: 25-100um
- Printing speed: 20mm/h
- Rated Power: 40W
- Working voltage: 12V DC
- Printer size: 220 x 200 x 400mm
- Printing Volume: 115 x 65 x 155 mm
- Printing material: 405nm photosensitive resin
- Net Weight: 6.6kgs
What is DLP?
The first thing you should know is that this printer is a desktop 3D printer that uses DLP technology. This is different from the FDM technology that is found in most 3D printers. Instead of melting a filament from a heated nozzle and printing bed, DLP printers use a liquid resin which is cured by UV light to form three-dimensional objects.
On the other hand, most SLA printers such as the Formlabs Form 2, uses a laser to cure the resin. However, DLP printers utilize a technology known as ‘Digital Light Processing.’ In this process, the whole image of the layer is exposed to light, effectively curing the resin layer by layer.
One thing that sets the Photon apart from its competitors is the ability to produce highly detailed objects. The resolution of the screen that emits light is an essential factor to consider when looking for a DLP 3D printer. This printer comes with a 2K resolution which, while not the highest, is excellent at this price point and will produce extremely detailed prints.
Build Volume
The Photon has a build volume of 115 x 65 x 155 mm which is quite small compared to FDM printers but average for DLP. If you want to print bigger objects, you will better off with open-frame FDM printers. Nonetheless, if you are a 3D printer enthusiast, you will be intrigued by what the Photon has to offer.
Safety with UV Resin
Before delving into resin printing, you should be aware that it can be a messy process and it uses toxic chemicals. It is vital that you take precautions when handling the liquid resin and uncured prints.
After printing, you will be required to wash the pieces with ethanol, cure them with a UV lamp, and clean the build plate. It is a messy process that can’t be avoided. The Anycubic Photon does have a carbon filter. However, the odor of the resin can still be very strong, especially in poorly ventilated spaces.
As a precautionary measure, users are strongly advised to wear gloves and protective masks when pouring the resin. Also, you should use the Photon (or any other resin-based printer) in a sufficiently ventilated room.
The way to get the best from resin printing is to be neat and orderly. Ideally, you should set up a cleaning station on your workbench with the surface protected from spills. Once you’ve had some practice and worked out a method, cleaning and curing your prints won’t seem so daunting and you will get some great prints.
Unboxing and Box Contents
The Photon is shipped fully assembled with minimal setup required. When you open the box, you will notice that the whole package is enclosed in a thick Styrofoam. This is to protect the printer because of the various delicate components involved.
You should be careful when removing the printer from the box to avoid damage. It is advisable first to lay the package horizontally and then remove the box carefully.
The windows of the printer are protected with protective sheeting that you should remove before use. Also, there is Styrofoam inserted in the print chamber to prevent the parts from shifting around during transit. After removing stickers and Styrofoam, you will be left with a small 3D printer with a very stylish design.
Inside the box, you will find:
- The printer
- Power brick and cable
- Manual (English, German, French and Japanese)
- Resin tank
- Variety of tools and accessories
- Gloves and safety mask
- A bottle of resin
- Filters for the resin
- A USB stick (8GB)
- Spatula
- Filters
Setup
Even though the Anycubic Photon is shipped pre-assembled, there are a few little things you will need to do before you can start printing. All in all the whole process should take you less than 30 minutes.
Firstly, you will need to check whether the 2K LCD screen is clean and free of dust. Although it may seem clean, it is advisable to clean it with a small cloth dabbed in isopropanol.
Once the print chamber is spotlessly clean, you can start leveling the Z-axis of the printer, just like you need to with FDM printers.
However, before you start leveling, it is advisable first to remove the resin tank as it will interfere with the leveling process. Two adjuster nuts are undone and the tank is off.
Using the touchscreen display, access the ‘tools’ settings where you will find ‘move Z’ function. When you click the home button, the Z-axis will start to descend. At the top of the print platform, there is a screw that needs to be loosed using the Allen wrench provided. Loosening the screw will allow you to tweak the platform to get it as level as possible.
After accomplishing that, you need to retighten the screw and grab a sheet of A4 paper to do bit leveling. Place the paper on the surface of the print chamber. Using the distance controls on the user interface, lower the platform until you feel resistance when you pull the paper back and forth.
This part of the leveling process of the Anycubic Photon is similar to FDM printers that are calibrated manually. When you feel a bit of resistance when pulling the paper, tighten the screw at the top of the platform to make sure it is secure and completely leveled. If the platform is not tight enough, there will be a risk of failed or poor-quality prints. Some good YouTube videos demonstrate how to do this clearer than just reading it.
After finishing with the leveling process, you should run a function test of the UV-LCD. First, raise the print platform to about 120mm and then go through ‘tools’ to ‘detection’ to ‘next.’ By doing so, the UV light will appear in the form of a bright rectangle inside the LCD screen.
In Use
Once everything’s set up, it’s time to start printing. Anycubic includes some test prints on the USB drive.
One of the test prints is a lattice cube structure, and it’s a perfect example to show off the advantages of using DLP technology. Since the model is already sliced, you don’t need to do anything more than press ‘print’!
In many cases, your first few attempts will fail. You may notice that the first layer does not completely adhere to the print bed, preventing the rest of the model from the building. If this happens, you will need to go back to step one, re-level the print bed and thoroughly clean the LCD screen with isopropanol.
You will soon see that it only takes a little tweak of the print bed to go from disaster to incredibly detailed print. And when you do, you’ll be in no doubt that the Anycubic Photon gives awe-inspiring high-quality details. After you have printed your first object, you will need to submerge it in an alcohol bath to clean the excess resin.
To ensure the print is cured enough, you should cure it with UV light. If you don’t have a UV chamber, you can use the power of the sun. Just place your print in water and leave it out in the sun. After a few hours, you will have a clean and solid print.
Post-Processing
Unlike FDM printers, DLP printers require regular cleaning both before and after printing. For instance, with the Anycubic Photon, you will need to remove the resin tank and remove any cured bits of resin that are swimming around. If you don’t clear these out, they could interfere with your next print and cause it to fail. To do this, place the filters provided in the package above the mouth of the resin bottle and pour the material. The solid parts will be strained out by the filter.
You should be careful when cleaning the resin tank particularly with the FEP film at the base. If you are not careful, you might scratch the film, and you will need to purchase another one. That is why you should use the plastic spatula provided when scraping out the cured resin chunks.
The LCD projector is another crucial component of the Photon that require cleaning. It is critical that no dust, resin or anything obstruct the light projector and the resin tank. The best way to clean these components is by using isopropyl alcohol.
Safety and UV Resin
Since the Anycubic Photon uses toxic resins, I strongly recommend you observe all the safety precautions. Cured solid resin is safe to handle, but whenever you’re anywhere near the liquid resin, you should wear gloves and safety goggles. This will help to avoid touching the uncured resin and splashing it in your eyes. However, once the resin is cured, you can touch the prints with your bare hands.
Furthermore, you are always advised to wear the surgical mask provided because the uncured resin disperses toxic fumes.
To avoid the uncured resin from spilling all over your working area, you can place the printer inside a tray. In the same way, you should also take care when handling the isopropyl alcohol.
Software
Anycubic provides their own slicing software with the Photon, and it works very well. You will only be required to change a few settings such as layer thickness, exposure time. However, until you’ve learned the ropes, you can happily leave these settings as default.
Thankfully the Anycubic Slicer provides full support structure control. You have the option to auto-generate supports or insert them manually. The slicer provided in the Anycubic Photon will enable you to control the shape, placement, radius, length, and density of the support structures. So you can place them in a way that leaves the least witness marks on your print.
Overall the Anycubic slicing software is fast and easy to use.
Buy one!
-Dylan
Last update on 2024-04-26 at 13:12